Monday, 28 August 2017

NodeJs - Introduction


The modern web application has really come a long way over the years with the introduction of many popular frameworks such as bootstrap, Angular JS, etc. All of these frameworks are based on the popular JavaScript framework.

But when it came to developing server based applications there was just kind of a void, and this is where Node.js came into the picture.

Node.js is also based on the JavaScript framework, but it is used for developing server-based applications. While going through the entire tutorial, we will look into Node.js in detail and how we can use it to develop server based applications.


What is Node.js?
Node.js is an open-source, cross-platform runtime environment used for development of server-side web applications. Node.js applications are written in JavaScript and can be run on a wide variety of operating systems.

Node.js is based on an event-driven architecture and a non-blocking Input/Output API that is designed to optimize an application's throughput and scalability for real-time web applications.

Over a long period of time, the framework available for web development were all based on a stateless model. A stateless model is where the data generated in one session (such as information about user settings and events that occurred) is not maintained for usage in the next session with that user.

A lot of work had to be done to maintain the session information between requests for a user. But with Node.js there is finally a way for web applications to have a real-time, two-way connections, where both the client and server can initiate communication, allowing them to exchange data freely.

Why use Node.js?
We will have a look into the real worth of Node.js in the coming chapters, but what is it that makes this framework so famous. Over the years, most of the applications were based on a stateless request-response framework. In these sort of applications, it is up to the developer to ensure the right code was put in place to ensure the state of web session was maintained while the user was working with the system.

But with Node.js web applications, you can now work in real-time and have a 2-way communication. The state is maintained, and the either the client or server can start the communication.

Features of Node.js
Let's look at some of the key features of Node.js

Asynchronous event driven IO helps concurrent request handling – This is probably the biggest selling points of Node.js. This feature basically means that if a request is received by Node for some Input/Output operation, it will execute the operation in the background and continue with processing other requests.

This is quite different from other programming languages. A simple example of this is given in the code below

var fs = require('fs');
          fs.readFile("Sample.txt",function(error,data)
          {
                console.log("Reading Data completed");
     });


The above code snippet looks at reading a file called Sample.txt. In other programming languages, the next line of processing would only happen once the entire file is read.
But in the case of Node.js the important fraction of code to notice is the declaration of the function ('function(error,data)'). This is known as a callback function.
So what happens here is that the file reading operation will start in the background. And other processing can happen simultaneously while the file is being read. Once the file read operation is completed, this anonymous function will be called and the text "Reading Data completed" will be written to the console log.
Node uses the V8 JavaScript Runtime engine, the one which is used by Google Chrome. Node has a wrapper over the JavaScript engine which makes the runtime engine much faster and hence processing of requests within Node also become faster.
Handling of concurrent requests – Another key functionality of Node is the ability to handle concurrent connections with a very minimal overhead on a single process.
The Node.js library used JavaScript – This is another important aspect of development in Node.js. A major part of the development community are already well versed in javascript, and hence, development in Node.js becomes easier for a developer who knows javascript.
There are an Active and vibrant community for the Node.js framework. Because of the active community, there are always keys updates made available to the framework. This helps to keep the framework always up-to-date with the latest trends in web development.


Who uses Node.js
Node.js is used by a variety of large companies. Below is a list of a few of them.

Paypal – A lot of sites within Paypal have also started the transition onto Node.js.
LinkedIn - LinkedIn is using Node.js to power their Mobile Servers, which powers the iPhone, Android, and Mobile Web products.
Mozilla has implemented Node.js to support browser APIs which has half a billion installs.
Ebay hosts their HTTP API service in Node.js


When to Use Node.js
Node.js is best for usage in streaming or event-based real-time applications like

Chat applications
Game servers – Fast and high-performance servers that need to processes thousands of requests at a time, then this is an ideal framework.
Good for collaborative environment – This is good for environments which manage document. In document management environment you will have multiple people who post their documents and do constant changes by checking out and checking in documents. So Node.js is good for these environments because the event loop in Node.js can be triggered whenever documents are changed in a document managed environment.
Advertisement servers – Again here you could have thousands of request to pull advertisements from the central server and Node.js can be an ideal framework to handle this.
Streaming servers – Another ideal scenario to use Node is for multimedia streaming servers wherein clients have request's to pull different multimedia contents from this server.
Node.js is good when you need high levels of concurrency but less amount of dedicated CPU time.

Best of all, since Node.js is built on javascript, it's best suited when you build client-side applications which are based on the same javascript framework.

When to not use Node.js

Node.js can be used for a lot of applications with various purpose, the only scenario where it should not be used is if there are long processing times which is required by the application.

Node is structured to be single threaded. If any application is required to carry out some long running calculations in the background. So if the server is doing some calculation, it won't be able to process any other requests. As discussed above, Node.js is best when processing needs less dedicated CPU time.


Saturday, 26 August 2017

Passing data on button click

When we add data in editText aand click on button, we will show this data on plainText.

Code as shown below:


Toggle and If-Else in android app

When button is ON, we are getting the corresponding message as shown below:


TextView value change in another view in android app

in android project, there is string.xml under res/values folder. we use this 'strings.xml' to store variable properties:

add below new name in strings.xml

<string name="string_value1">Value from strings.xml</string>


Now, add textview and render strings.xml name - value in this texview


Now, lets change the value of TextView from java code:


One Activity To another Activity in android app

When we click on button, we should go to another activity. Lets use existing project.

add second activity on button listenerL

clickButton.setOnClickListener(new View.OnClickListener() {
    @Override    public void onClick(View view) {
        //Toast.makeText(getApplicationContext(),"You just clicked button",Toast.LENGTH_LONG).show();        Intent intent = new Intent(MainActivity.this,SecondActivity.class);
        startActivity(intent);
    }
});


Now add second activity:

right click on res folder and create SecondActivity:

New--> Activity--> Empty Activity


When we run code as shown below,


When we click on 'CLICK ME' button, below second activity comes:


Button Click Activity in android app

Button Click Activity in android app


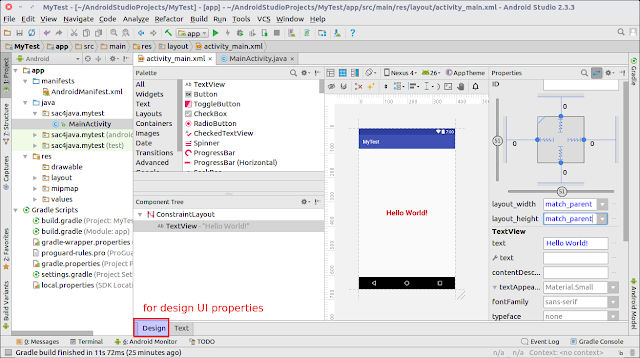
create the androd project, Please refer my previous article first android hello world app.

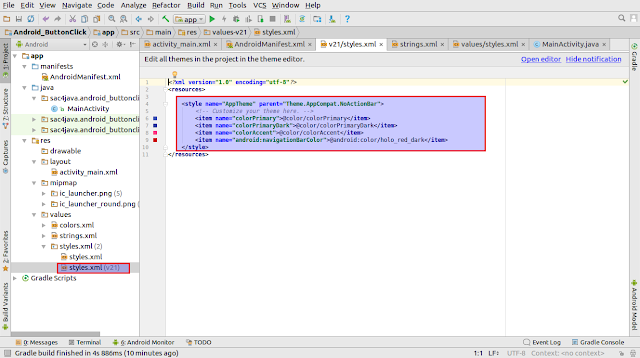
I have changed the theme as of below:


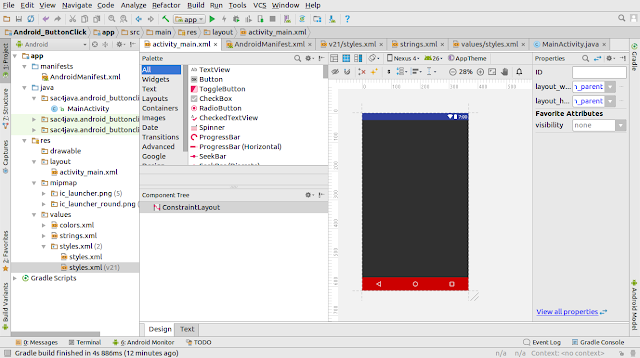
Lets add one button and add click event listener:


Now, add code in java file to handle button click event:


To add Action bar in the app:


To add backgraound image in app:

Copy required image in res/drawable folder:


Its done!!!!


First Android Hello World app


Installing Android Studio in Linux/Ubuntu

For android app devlopment, we need Andrioid Studio, it acts as a android app development IDE like eclipse, intelliij etc.

Install Android studio for Ubuntu:

1. First install java 8.
To install Java8, use below commands from linux terminal:

sudo add-apt-repository ppa:webupd8team/java
sudo apt-get update
sudo apt-get install oracle-java8-installer
After that
sudo apt-get install oracle-java8-set-default


2. Now install Android studio.
We can do it with 2 ways.
    A. By downloading and unzipping android studio files.

Installing Android Studio

  1. Download Android Studio from here, use All Android Studio Packages
  2. Extract the archive file into an appropriate location for your applications, eg: /opt. Use the filename of your downloaded archive, in my example android-studio-ide-141.2178183-linux.zip
    sudo unzip android-studio-ide-141.2178183-linux.zip -d /opt
  3. To launch Android Studio, navigate to the /opt/android-studio/bin directory in a terminal and execute ./studio.sh. Or use a desktop file, see below.
    You may want to add /opt/android-studio/bin to your PATH environmental variable so that you can start Android Studio from any directory.

Create a desktop file

Create a new file androidstudio.desktop by running the command:
nano ~/.local/share/applications/androidstudio.desktop
and add the lines below
[Desktop Entry]
Version=1.0
Type=Application
Name=Android Studio
Exec="/opt/android-studio/bin/studio.sh" %f
Icon=/opt/android-studio/bin/studio.png
Categories=Development;IDE;
Terminal=false
StartupNotify=true
StartupWMClass=android-studio


B. By linux command terminal

Using ubuntu-make
Ubuntu Make is a command line tool which allows you to download the latest version of popular developer tools on your installation, installing it alongside all of the required dependencies (which will only ask for root access if you don't have all the required dependencies installed already), enable multi-arch on your system if you are on a 64 bit machine, integrate it with the Unity launcher. Basically, one command to get your system ready to develop with!


sudo add-apt-repository ppa:ubuntu-desktop/ubuntu-make
sudo apt update
sudo apt install ubuntu-make

For Ubuntu 15.10 and up
Ubuntu Make is already in official repositories, run :
sudo apt install ubuntu-make
Note that umake version should be 16.05 to be able to download android studio, check by running
umake --version
If not, use the Ubuntu 14.04 method to install it.

I am seeing in my system,

it000483@IND-PUN-LAP-183:~$ umake --version
17.03
It means, umake is installed with version 17.03 version

Then  use below commands for 

$umake android --accept-license


Its done.


Friday, 25 August 2017

MergeSort

MergeSort

package sort;

import java.util.Arrays;

/*MergeSort is DIVIDE AND CONQUER
 DIVIDE - divide the array recursively till it contains single element (1-->half-->quarter ...so on)
 CONQUER - merge the divided arrays in sorted order
 
 * */


/**
 * @author sachin4java@blogspot.com
 *
 */
public class MergeSort {

public static void main(String[] args) {
int arr[] = {64,25,12,22,11};
System.out.println("Given array"+Arrays.toString(arr));
       sort(arr,0,arr.length-1);
       System.out.println("Sorted array"+Arrays.toString(arr));

}

public static void sort(int[] arr, int start, int end){

if(start<end){
//find middle
int m = (start+end)/2;
//divide the array recursively
sort(arr,start,m);
sort(arr,m+1,end);

//merge the above divided arrays in sorted order

merge(arr, start,m,end);


}

}

private static void merge(int[] arr, int start, int m, int end) {
//first create left and right arrays
//sizes of arrays
int s1 = m-start+1;
int s2 = end-m;

int left[] = new int[s1];
int right[] = new int[s2];

//copy the elemnts of arrays
for (int i = 0; i < s1; ++i) {
left[i]=arr[start+i];
}
for (int i = 0; i < s2; ++i) {
right[i]=arr[m+1+i];
}

//now merge in sorted fashion
int i=0,j=0;//for start index of left and right arrays
int k=start;// this will keep the index position in main array
while(i<s1 && j<s2){

if(left[i]<=right[j]){
arr[k]=left[i];
i++;
}else {
arr[k]=right[j];
j++;

}
//increment index by 1
k++;

}
//also there are possibilities that array having some remaaining elements
//lets add it in maain array with index k
while(i<s1){
arr[k]=left[i];
i++;
k++;
}
while(j<s2){
arr[k]=right[j];
j++;;
k++;
}


}

}


OUTPUT:

Given array[64, 25, 12, 22, 11]
Sorted array[11, 12, 22, 25, 64]

SelectionSort

SelectionSort


package sort;

import java.util.Arrays;

/*The selection sort algorithm sorts an array by repeatedly finding the minimum element (considering ascending order) from unsorted part and putting it at the beginning. The algorithm maintains two subarrays in a given array.

1) The subarray which is already sorted.
2) Remaining subarray which is unsorted.

In every iteration of selection sort, the minimum element (considering ascending order) from the unsorted subarray is picked and moved to the sorted subarray.
*/
/**
 * @author sachin4java@blogspot.com
 *
 */
public class SelectionSort {

public static void main(String[] args) {

       int arr[] = {64,25,12,22,11};
       sort(arr);
       System.out.println("Sorted array"+Arrays.toString(arr));

}

public static void sort(int[] arr){
for (int i = 0; i < arr.length; i++) {

int min_idx=i;
//this whole iteration will find one minimum element and will put into sorted position
for (int j = i+1; j < arr.length; j++) {
if(arr[j]<arr[min_idx]){
min_idx=j;
}
}
//swap the minimum element
int temp = arr[min_idx];
            arr[min_idx] = arr[i];
            arr[i] = temp;


}
}

}


OUTPUT:
Given array[64, 25, 12, 22, 11]
Sorted array[11, 12, 22, 25, 64]


InsertionSort.java

InsertionSort

package sort;

import java.util.Arrays;

/*Insertion sort is to take  insert index point(here we have taken 1) and then check this index element
with all elements from left side to find the insert position.

In each iteration, we get the fixed position of the element
*/
public class InsertionSort {

public static void main(String[] args) {

       int arr[] = {64,25,12,22,11};
       System.out.println("Given array"+Arrays.toString(arr));
       sort(arr);
       System.out.println("Sorted array"+Arrays.toString(arr));

}

public static void sort(int[] arr){

for (int i = 1; i < arr.length; i++) {
int index = arr[i];
int j=i-1;  //for going index right to left element position

while(j>=0 && arr[j]>index){
arr[j+1]=arr[j];//move element postion by one to make space for index element
j=j-1;
}

arr[j+1]=index; //add the index element at this position

}
}

}


OUTPUT:

Given array[64, 25, 12, 22, 11]
Sorted array[11, 12, 22, 25, 64]


BubbleSort.java

BubbleSort


package sort;

import java.util.Arrays;
/*bubble sort swap adjacent elements in order from left to right, So in each
iteration, we get sorted array at right most part.
We need to handle this with skippign rightmost sorted part.

Just remember : second for loop (j<arr.length-i-1) which skips sorted part

Worst and Average Case Time Complexity: O(n*n). Worst case occurs when array is reverse sorted.

Best Case Time Complexity: O(n). Best case occurs when array is already sorted.

Auxiliary Space: O(1)

Boundary Cases: Bubble sort takes minimum time (Order of n) when elements are already sorted.
*/
/**
 * @author sachin4java@blogspot.com
 *
 */
public class BubbleSort {

public static void main(String[] args) {
int arr[] = {64,25,12,22,11};
System.out.println("Given array"+Arrays.toString(arr));
       sort(arr);
       System.out.println("Sorted array"+Arrays.toString(arr));

}

public static void sort(int[] arr){

for (int i = 0; i < arr.length-1; i++) {
for (int j = 0; j < arr.length-i-1; j++) {
if(arr[j]>arr[j+1]){
//swap
int temp = arr[j];
arr[j]=arr[j+1];
arr[j+1]=temp;
}

}

}

}

}

OUTPUT:

Given array[64, 25, 12, 22, 11]

Sorted array[11, 12, 22, 25, 64]

JumpSearch

JumpSearch

package search;
/*JumpSearch is nothing but to divide the array into steps and  search it alongwith steps.*/

/**
 * @author sachin4java@blogspot.com
 *
 */
public class JumpSearch {

public static void main(String[] args) {
int arr[] = { 0, 1, 1, 2, 3, 5, 8, 13, 21,34, 55, 89, 144, 233, 377, 610};
   int x = 55;
   // Find the index of 'x' using Jump Search
   int index = jumpSearch(arr, x);
   // Print the index where 'x' is located
   System.out.println("\nNumber " + x + " is at index " + index);
}
   public static int jumpSearch(int[] arr, int x)
   {
       int n = arr.length;
 
       // Finding block size to be jumped
       int step = (int)Math.floor(Math.sqrt(n));
 
       // Finding the block where element is
       // present (if it is present)
       int prev = 0;
       while (arr[Math.min(step, n)-1] < x)
       {
           prev = step;
           step += (int)Math.floor(Math.sqrt(n));
           if (prev >= n)
               return -1;
       }
 
       // Doing a linear search for x in block
       // beginning with prev.
       while (arr[prev] < x)
       {
           prev++;
 
           // If we reached next block or end of
           // array, element is not present.
           if (prev == Math.min(step, n))
               return -1;
       }
 
       // If element is found
       if (arr[prev] == x)
           return prev;
 
       return -1;
   }
 

}


OUTPUT:

Number 55 is at index 10

Extract error records while inserting into db table using JDBCIO apache beam in java

 I was inserting data into postgres db using apache beam pipeline. it works perfectly with JdbcIO write of apache beam library. But, now, i ...