Showing posts with label Ubuntu/LINUX. Show all posts

Wednesday, 31 January 2018

Docker Install error: Err:1 http://in.archive.ubuntu.com/ubuntu zesty/universe amd64 cgroupfs-mount all 1.3

I am using Ubuntu. while installing docker, I was getting below error, then I followed below steps to overcome the same.

 Err:1 http://in.archive.ubuntu.com/ubuntu zesty/universe amd64 cgroupfs-mount all 1.3


Open Terminal & run:

sudo gedit /etc/apt/sources.list
Replace url in.archive.ubuntu.com and security.ubuntu.com with old-releases.ubuntu.com

save and close it.

Now run sudo apt-get update and after then install any packages you want to install.

Then, I ran Docker install command,
sachin@sachin-E470:~$ sudo apt-get install docker-ce

sachin@sachin-E470:~$ docker --version

Docker version 17.12.0-ce, build c97c6d6

and its worked!!

Wednesday, 3 January 2018

Install RabbitMQ in Ubuntu

Install RabbitMQ in Ubuntu

Step 1 – Install Erlang


$wget https://packages.erlang-solutions.com/erlang-solutions_1.0_all.deb
$sudo dpkg -i erlang-solutions_1.0_all.deb

Now, you can install erlang package on your system using the following command. This will install all of its dependencies as well.

$sudo apt-get update
$sudo apt-get install erlang erlang-nox

Step 2 – Install RabbitMQ Server


After installing requirements, now enable RabbitMQ apt repository on your system. Also you need to import rabbitmq signing key on your system.

$echo 'deb http://www.rabbitmq.com/debian/ testing main' | sudo tee /etc/apt/sources.list.d/rabbitmq.list
$wget -O- https://www.rabbitmq.com/rabbitmq-release-signing-key.asc | sudo apt-key add -

After that update apt cache and install RabbitMQ server on your system.

$sudo apt-get update
$sudo apt-get install rabbitmq-server

Step 3 – Manage RabbitMQ Service


After completing installations, enable the RabbitMQ service on your system. Also, start the RabbitMQ service. Use one the below methods sysvinit for older systems or systemctl for the latest operating system.


Using Systemctl –
sudo systemctl enable rabbitmq-server
sudo systemctl start rabbitmq-server
sudo systemctl stop rabbitmq-server


Step 4 – Create Admin User in RabbitMQ


By default rabbitmq creates a user named “guest” with password “guest”. You can also create your own administrator account on RabbitMQ server using following commands. Change password with your own password.

$sudo rabbitmqctl add_user admin password
$sudo rabbitmqctl set_user_tags admin administrator
$sudo rabbitmqctl set_permissions -p / admin ".*" ".*" ".*"

Step 5 – Setup RabbitMQ Web Management Console


RabbitMQ also provides and web management console for managing the entire RabbitMQ. To enable web management console run following command on your system. The web management console helps you for managing RabbitMQ server.

$sudo rabbitmq-plugins enable rabbitmq_management

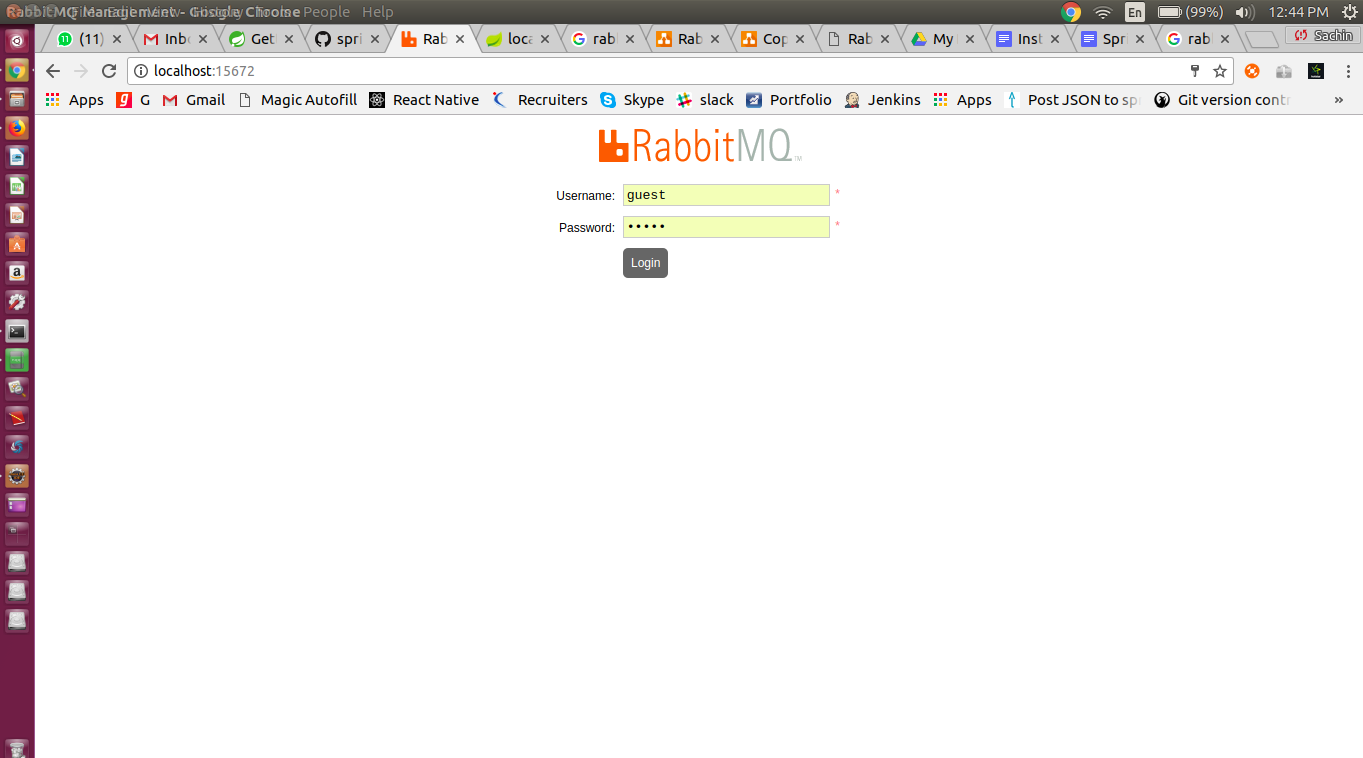
RabbitMQ dashboard starts on port 15672. Access your server on the port to get dashboard. Use the username and password created in step 4


That’s it. Done!!!

Java 9 install in Ubuntu

Java 9 install in Ubuntu


1. Add the PPA.
sachin@sachin-E470:~$ sudo add-apt-repository ppa:webupd8team/java

2. Refresh system package cache and install the installer scripts via 2 commands one by one:
sachin@sachin-E470:~$ sudo apt-get update
sachin@sachin-E470:~$ sudo apt-get install oracle-java9-installer -Y
3. Once the script successfully installs Java 9 on your system, you may run command to set java 9 environment variables:
sachin@sachin-E470:~$ sudo apt-get install oracle-java9-set-default
4. Check Java Version
sachin@sachin-E470:~$ java --version
java 9.0.1
Java(TM) SE Runtime Environment (build 9.0.1+11)
Java HotSpot(TM) 64-Bit Server VM (build 9.0.1+11, mixed mode)

Its done.


Friday, 29 December 2017

Install Jenkins in Ubuntu

Install Jenkins in Ubuntu

add the repository key to the system.
$wget -q -O - https://pkg.jenkins.io/debian/jenkins-ci.org.key | sudo apt-key add -

append the Debian package repository address to the server's sources.list:
$echo deb https://pkg.jenkins.io/debian-stable binary/ | sudo tee /etc/apt/sources.list.d/jenkins.list

When both of these are in place, we'll run update so that apt-get will use the new repository:
$sudo apt-get update

Finally, we'll install Jenkins and its dependencies, including Java:
sudo apt-get install jenkins

Starting Jenkins
$sudo systemctl start jenkins


use its status command to verify that it started successfully:
sachin@sachin-E470:~$ sudo systemctl status jenkins
● jenkins.service - LSB: Start Jenkins at boot time
  Loaded: loaded (/etc/init.d/jenkins; generated; vendor preset: enabled)
  Active: active (exited) since Sat 2017-12-30 00:13:42 IST; 2min 31s ago
    Docs: man:systemd-sysv-generator(8)
   Tasks: 0 (limit: 4915)
  CGroup: /system.slice/jenkins.service

Dec 30 00:13:41 sachin-E470 systemd[1]: Starting LSB: Start Jenkins at boot time...
Dec 30 00:13:41 sachin-E470 jenkins[27728]:  * Starting Jenkins Automation Server jenkins
Dec 30 00:13:41 sachin-E470 su[27746]: Successful su for jenkins by root
Dec 30 00:13:41 sachin-E470 su[27746]: + ??? root:jenkins
Dec 30 00:13:41 sachin-E470 su[27746]: pam_unix(su:session): session opened for user jenkins by (uid=0)
Dec 30 00:13:42 sachin-E470 jenkins[27728]:    ...done.
Dec 30 00:13:42 sachin-E470 systemd[1]: Started LSB: Start Jenkins at boot time.


Now that Jenkins is running, we'll adjust our firewall rules so that we can reach Jenkins from a web browser to complete the initial set up.

Opening the Firewall
By default, Jenkins runs on port 8080, so we'll open that port using ufw:

$sudo ufw allow 8080


We can see the new rules by checking UFW's status.

$sudo ufw status

Note: If the firewall is inactive, the following commands will make sure that OpenSSH is allowed and then enable it.

$sudo ufw allow OpenSSH
$sudo ufw enable


Setting up Jenkins

add http://<ip_address_or_domain_name>:8080 in  the browser.

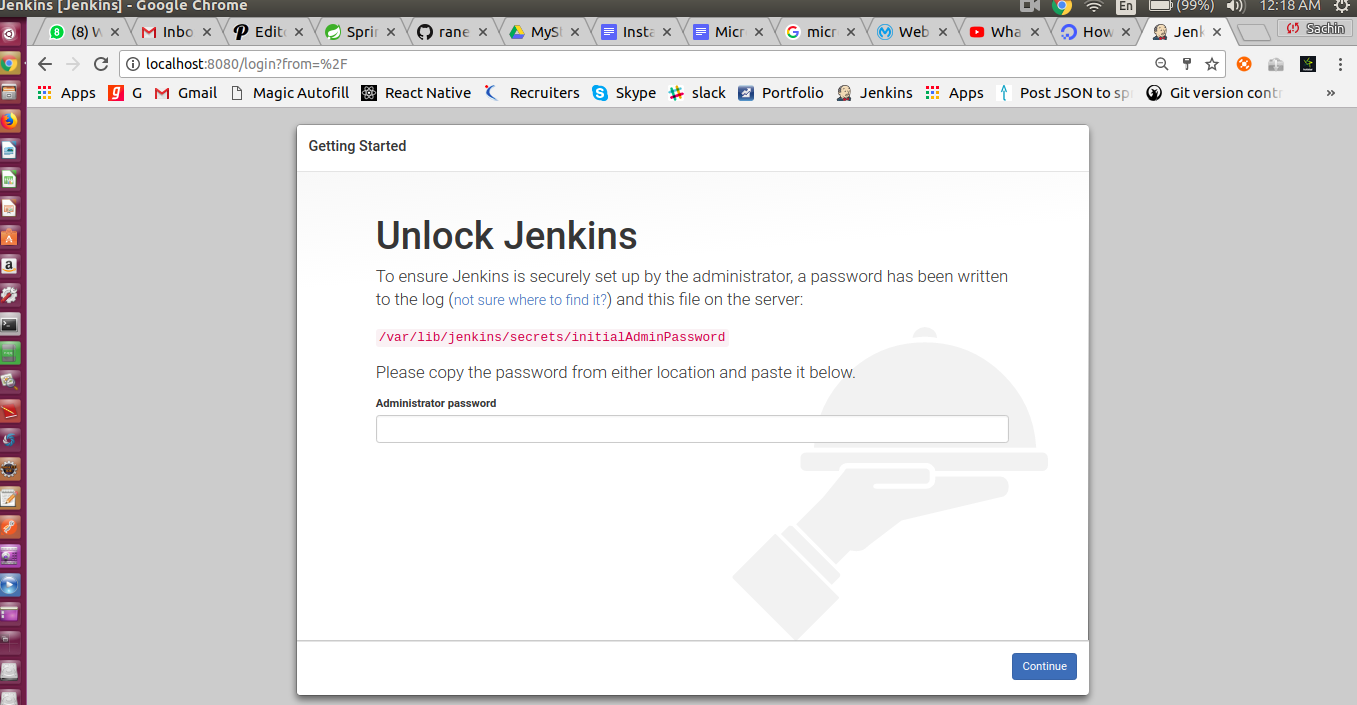
Unlock Jenkins" screen, which displays the location of the initial password


sachin@sachin-E470:~$ sudo tail -f /var/lib/jenkins/secrets/initialAdminPassword
You will get password like 5989a6235bcc4548a0d156fdf050c0bd

Copy this password and enter in above input text box.


Click on Install suggested plugins.
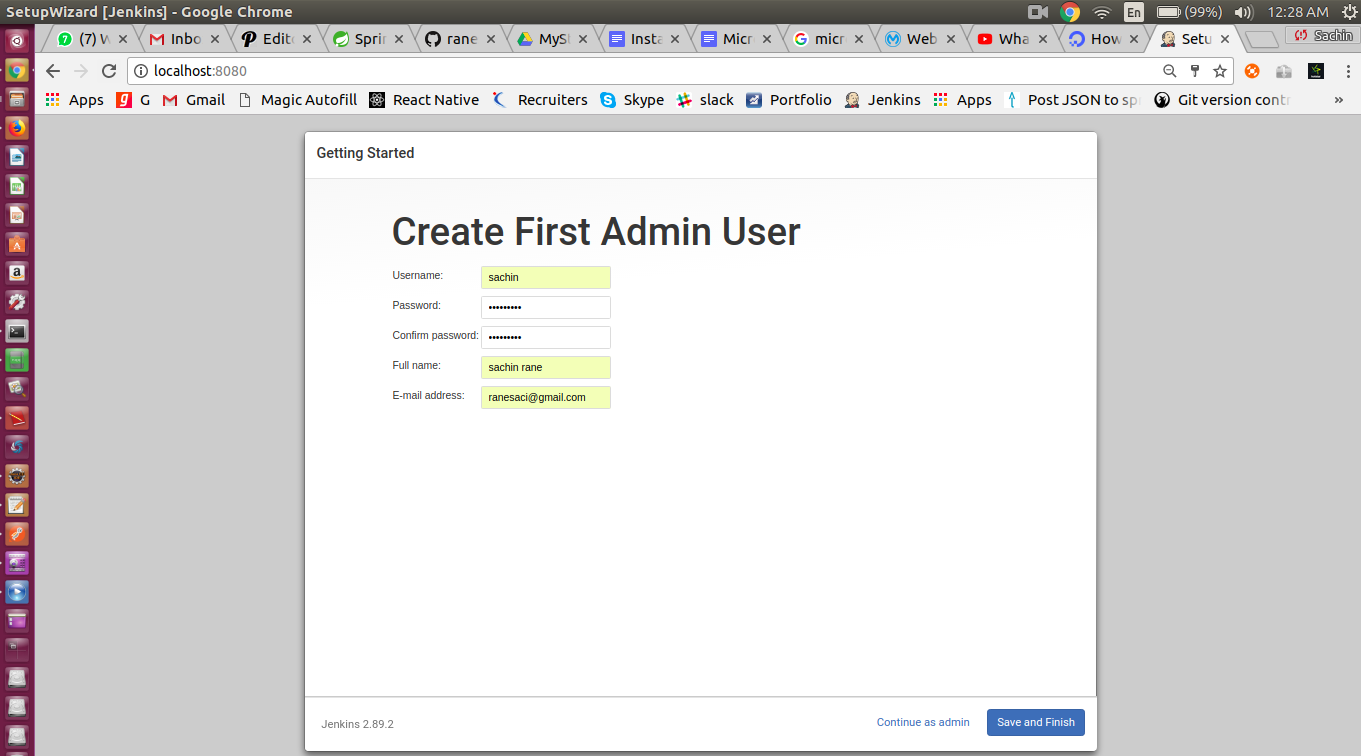
When the installation is complete, we'll be prompted to set up the first administrative user. It's possible to skip this step and continue as admin using the initial password we used above, but we'll take a moment to create the user.


Once the first admin user is in place, you should see a "Jenkins is ready!" confirmation screen.


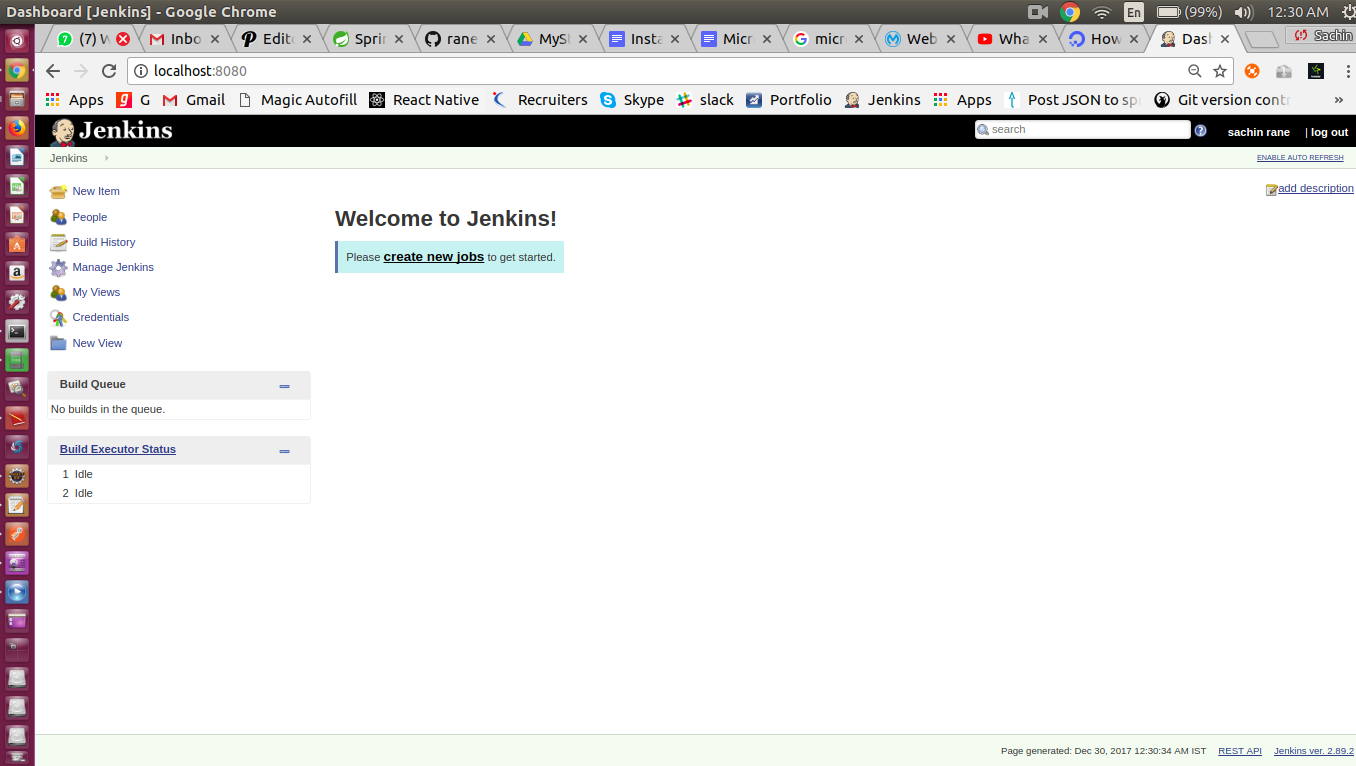
Click "Start using Jenkins" to visit the main Jenkins dashboard:


Jenkins has been successfully installed.


Automate Port kill using shell script in Unix/Ubuntu


Many Times, we are getting ''port already in use' while working with server application on different ports.

Find process associated with port and killing that process is time consuming and tedious task.

Solution:

Create port-kill.sh file in home folder and copy below code inside that file.

$sudo gedit ${HOME}/port-kill.sh


for i in "$@"; do
  echo 'killing port= ' $i
  kill -9 $(lsof -t -i:$i)
  #lsof -i -P|grep $i | awk 'NR!=1 {print $2}' | xargs kill -9
  echo 'killed port= ' $i
done


Run port-kill.sh file by passing port number as parameter.

$sh ${HOME}/port-kill.sh <port-numbers-separated-by-space>

For Ex. I want to close process runing on 9000 port number

sachin@sachin-E470:~$ lsof -i -P|grep 9000
java    12335 sachin   31u  IPv6 781666      0t0  TCP *:9000 (LISTEN)
sachin@sachin-E470:~$ sh port-kill.sh 9000 
killing port=  9000

killed port=  9000
sachin@sachin-E470:~$ 
sachin@sachin-E470:~$ lsof -i -P|grep 9000
sachin@sachin-E470:~$ 

ScreenShot:


Automate frequent tasks using shell script in Linux/Ubuntu


As we are developer, We need to start many things frequently. But to start any app/server, we need to navigate to that folder and needs to execute it. This is very time consuming and ridiculous process.

Solution:

Create one shell script file and manage all tasks through proxy gateway number using  if else.

For ex. I am registering proxy gateways for eclipse, android studio, spring boot servers etc. as shown below:

create start.sh file in home:

$sudo gedit ${HOME}/start.sh

Copy below script in ge editor opened:

echo "Please choose any one from below choices..."

echo "1. Eclipse "
echo "2. Android Studio"
echo "3. Products Service - http://localhost:9000/"
echo "4. Crawler Service - http://localhost:9001/"
echo "5. Eureka Service - http://localhost:9002/"
echo "6. Zuul Service Service - http://localhost:9003/"
echo "********************************************"

echo "Enter your choice number"


while :
do
  read INPUT_STRING
  case $INPUT_STRING in
1)
echo "Starting Eclipse!!!"
nohup /home/sachin/eclipse/jee-oxygen/eclipse/eclipse;
break
;;
2)
echo "Starting Android Studio!!!"
nohup sh /home/sachin/softwares/android-studio/bin/studio.sh;
break
;;

3)
echo "Starting Products Service - http://localhost:9000/!!!"
cd /home/sachin/Microservices/Test/products-db/;
gradle assemble
cd build/libs/
java -jar ./products-db-0.0.1-SNAPSHOT.jar 
break
;;

4)
echo "Starting Crawler Service - http://localhost:9001/!!!"
cd /home/sachin/Microservices/Test/products-crawler;
gradle assemble
cd build/libs/
java -jar ./products-crawler-0.0.1-SNAPSHOT.jar 
break
;;
5)
echo "Starting Eureka Service - http://localhost:9002/!!!"
cd /home/sachin/Microservices/Test/eureka-server-module;
gradle assemble
cd build/libs/
java -jar ./eureka-server-module-0.0.1-SNAPSHOT.jar 
break
;;
6)
echo "Zuul Service Service - http://localhost:9003!!!"
cd /home/sachin/Microservices/Test/zuul-module-service;
gradle assemble
cd build/libs/
java -jar ./zuul-module-service-0.0.1-SNAPSHOT.jar 
break
;;
*)
echo "Sorry, I don't understand"
;;
  esac
done

Start Task using start.sh

sachin@sachin-E470:~$ sh start.sh 
Please choose any one from below choices...
1. Eclipse 
2. Android Studio
3. Products Service - http://localhost:9000/
4. Crawler Service - http://localhost:9001/
5. Eureka Service - http://localhost:9002/
6. Zuul Service Service - http://localhost:9003/
********************************************
Enter your choice number
4
Starting Crawler Service - http://localhost:9001/!!!
:compileJava UP-TO-DATE
:processResources UP-TO-DATE
:classes UP-TO-DATE
:findMainClass
:jar
:bootRepackage
:assemble

BUILD SUCCESSFUL

Total time: 2.959 secs
2017-12-29 14:31:07.196  INFO 9929 --- [           main] s.c.a.AnnotationConfigApplicationContext : Refreshing org.springframework.context.annotation.AnnotationConfigApplicationContext@28ba21f3: startup date [Fri Dec 29 14:31:07 IST 2017]; root of context hierarchy
2017-12-29 14:31:07.724  INFO 9929 --- [           main] f.a.AutowiredAnnotationBeanPostProcessor : JSR-330 'javax.inject.Inject' annotation found and supported for autowiring
2017-12-29 14:31:07.812  INFO 9929 --- [           main] trationDelegate$BeanPostProcessorChecker : Bean 'configurationPropertiesRebinderAutoConfiguration' of type [org.springframework.cloud.autoconfigure.ConfigurationPropertiesRebinderAutoConfiguration$$EnhancerBySpringCGLIB$$1310cc78] is not eligible for getting processed by all BeanPostProcessors (for example: not eligible for auto-proxying)

  .   ____          _            __ _ _
 /\\ / ___'_ __ _ _(_)_ __  __ _ \ \ \ \
( ( )\___ | '_ | '_| | '_ \/ _` | \ \ \ \
 \\/  ___)| |_)| | | | | || (_| |  ) ) ) )
  '  |____| .__|_| |_|_| |_\__, | / / / /
 =========|_|==============|___/=/_/_/_/

 :: Spring Boot ::        (v1.5.9.RELEASE)

ScreenShot:


This way, we can add tasks and execute it with common gateeway using shell script


Sunday, 11 June 2017

Shell script to deploy build and start SpringBoot project on Linux/Ubuntu

Provide the below paths at top in below test.sh file:

Step1: Run with gradlew

create below gradle.sh file.

gradle.sh :
export GRADLE_HOME=/opt/gradle/gradle-3.0;
export PATH="$PATH:$GRADLE_HOME/bin";
cd <PROJECT_HOME_PATH>;
gradle clean bootRun -PdebugPort=8000  --debug ;
---------------------------------------------------------------------

$sh gradle.sh  ---for runing sh file


Step2: Run with nohup, So we can close console

for Better use, create below folders:
-- /<my-dir>/checkouts - Here cheeckout/copy springboot project
--/<my-dir>/deployment - here we we will add bootPackage run details from /<my-dir>checkouts/<project>/build/app-classpath/* and /<my-dir>checkouts/<project>/build/libs/<project-version.jar>

Steps:
1. checkout gradle project in /<my-dir>/<gradle_project>
2.  go to /<my-dir>/<gradle_project> and run below commands

chmod +x gradlew
./gradlew clean eclipse
./gradlew clean bootRepackage -Pprofile=<local/qa9>

3. copy /<my-dir>checkouts/<project>/build/app-classpath/* to <my-dir>/deployment/<gradle_project_name>/config/ folder. here we need to create confiig folder before copy

4.copy  /<my-dir>checkouts/<project>/build/libs/<project-version.jar> to /<my-dir>/deployment/<project>/
5. go to  /<my-dir>/deployment/<project>/

6. Run below nohup command

nohup java -Dloader.path="config/*" -Xms256m -Xmx1024m  -jar <project-version.jar> --spring.config.location=config/<gradle_project_name>.yml --logging.config=config/log4j2-spring.yml --spring.profiles.active=<local/qa9> > console.log &


To automate above steps in shell script: below is deploy.sh file:

Steps:
1. Put this deploy.sh file in checkouts/<projectName>/ path
2. Make sure Checkouts and deployment folder at parallel
3. run sh deploy.sh <profile_name> command from terminal

deploy.sh:
--------------------------------
project_root_dir="$PWD"
profile=$1;
project_name=$( echo $project_root_dir | rev | cut -d/ -f1 | rev);
echo "Project name: $project_name";
deployment_dir=$project_root_dir/../../deployment;
echo "Deploy project profile : $profile";
echo "project root dir: $project_root_dir";

cd $project_root_dir;
pwd;

cd $deployment_dir;
pwd;
echo "Creating project folder in deployment";
echo "Removing config and jar";
rm -rf $project_name/config $project_name/content*.jar;
echo "Removed config and jar";
mkdir $deployment_dir/$project_name;
cd $deployment_dir/$project_name;
pwd;
ls;
mkdir config;
echo "Dir created :$project_root_dir/../../deployment/config ";


echo "Creating jar and config the springBoot project";
cd $project_root_dir;
chmod +x gradlew;
./gradlew clean eclipse;
./gradlew clean bootRepackage -Pprofile=$profile;
date;
echo "Copying jar and config folder to deployment folder";
cp -r $project_root_dir/build/app-classpath/*  $deployment_dir/$project_name/config;
echo "Copied $project_root_dir/../../deployment/$project_name/config";
cd $project_root_dir/../../deployment/$project_name/config;
ls -lart;

cp -r $project_root_dir/build/libs/content*.jar  $deployment_dir/$project_name/;
echo "Copied jar file";
cd $deployment_dir/$project_name;
ls -lart;
echo "Runing Jar Dir:$pwd";

echo "Running jar with nohup";

echo "nohup java -Dloader.path=config/* -Xms256m -Xmx512m  -XX:+PrintGCDetails -XX:+PrintGCDateStamps -Xloggc:"$project_name"_gc.log -XX:+UseGCLogFileRotation -XX:NumberOfGCLogFiles=5 -XX:GCLogFileSize=20000k -XX:+UseG1GC -XX:+HeapDumpOnOutOfMemoryError -XX:HeapDumpPath="$project_name"_java_pid.hprof  -jar "$project_name"-1.0.0.jar --spring.config.location=config/"$project_name".yml --logging.config=config/log4j2-spring.yml --spring.profiles.active=$profile > console.log &";

nohup java -Dloader.path=config/* -Xms256m -Xmx512m  -XX:+PrintGCDetails -XX:+PrintGCDateStamps -Xloggc:"$project_name"_gc.log -XX:+UseGCLogFileRotation -XX:NumberOfGCLogFiles=5 -XX:GCLogFileSize=20000k -XX:+UseG1GC -XX:+HeapDumpOnOutOfMemoryError -XX:HeapDumpPath="$project_name"_java_pid.hprof  -jar "$project_name"-1.0.0.jar --spring.config.location=config/"$project_name".yml --logging.config=config/log4j2-spring.yml --spring.profiles.active=$profile > console.log & 

tail -f console.log;

-----------------------------------


Extract error records while inserting into db table using JDBCIO apache beam in java

 I was inserting data into postgres db using apache beam pipeline. it works perfectly with JdbcIO write of apache beam library. But, now, i ...