
10. Add Android Studio project To github
Android Studio comes with the Git client. All we need to do is enabling it.
As a prerequisite, you need to install git in your local environment.
Here are the steps to configure git in Android Studio
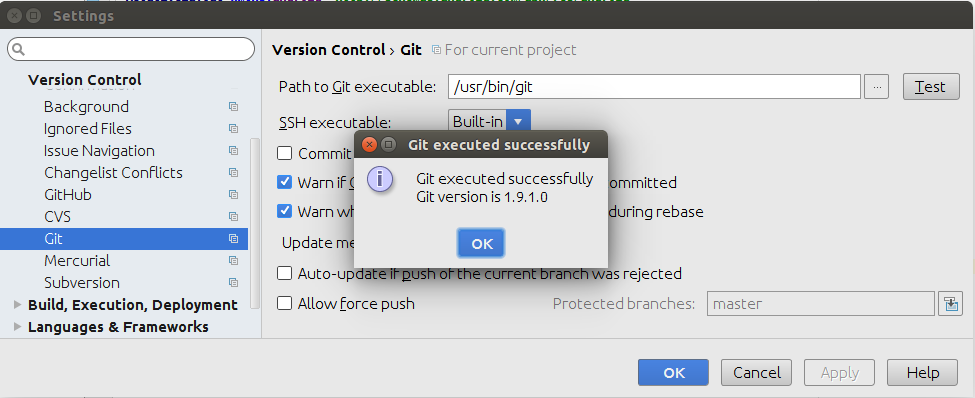
1. Test if Git is Configured
In Android Studio, go to ‘File’ –> ‘Settings(Ctrl+Alt+S)’ –> ‘Version Control’ –> ‘Git’. Then click ‘Test’ to ensure that Git is configured properly in Android Studio. You will get the version name and message on successful test.
or, Alternatively, you can use Terminal command:
git – – version
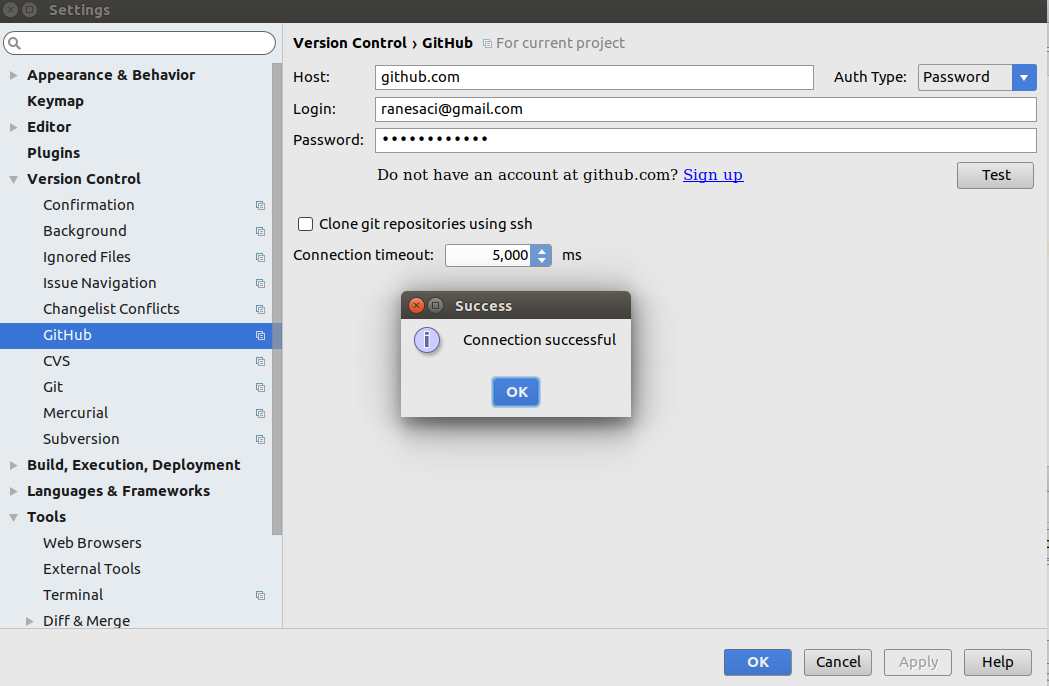
2. Login to your GitHub Account
Now, go to ‘File’ –> ‘Settings(Ctrl+Alt+S)’ –> ‘Version Control’ –> ‘GitHub’.
Add you GitHub credentials. And then click ‘Test’ to ensure that GitHub connection.
3. Enable Version Control Integration
Select ‘VCS’ –> ‘Enable Version Control Integration…’ to enable version control for the current project.
4. Share project on your VCS
got to ‘VCS’ –> ‘Import into Version Control’ – > ‘Share Project on GitHub’ for creating a repository on GitHub.
5. Make Changes in the file and pushing to the repository

That’s all about adding project to git. Thank you!!

No comments:
Post a Comment